8 WAYS TO TAKE MORE EXPRESSIVE AND CREATIVE IPHONE PHOTOS
There’s no doubt about it, the best camera really is the one you have with you. For one thing, simplifying your equipment can be really helpful if you're a beginner photographer, and especially if you’re still struggling with manual mode.
More than this though, as a mother of young children, I often don’t have time to reach for my big camera, so 9 times out of 10, it’s my camera phone that gets me creating instead of staying stuck. If I’m having a bad day, I can look for the light and escape for a moment. It’s the tool that takes me out of my head and puts me back in my body, which is a far better place to be. All that being said, here are some of my favourite ways to take more creative and expressive photos with my iphone.
Shoot silhouettes
Silhouette photos are great for expressing mood and emotion. The absence of detail in the subject adds an air of mystery that leaves artistic expression open to interpretation.
How?
To shoot a silhouette, you need to capture something that is in front of a bright background such as the sun. This creates a dramatic contrast between the bright background and the dark subject, resulting in a silhouette.
Silhouettes tend to look their best when they have a strong, clear outline, so finding the right kind of subject is important. Get down low and point your camera phone up to help isolate your subject.

Use AE lock
Let’s say you see a brightly lit flower poking out of a dark bush. A small pocket of sunshine in the darkness. Your camera will see this scene of both light and dark and, without any input from you, struggle to know you want to photograph it. As a result, It will capture a little bit of the light and a little bit of the dark. So you’ll lose a lot of that deliciously dramatic contrast.
Using the AE/AF lock on an iPhone allows you to capture this scene faithfully, with rich, dark blacks. It’ll help you capture and lean in to the the way that moment felt : moody.
AE/AF lock is useful in challenging lighting conditions but it also allows you to take multiple shots of the same subject while keeping the same focus and exposure. Very handy.
HOW?
To use the AE/AF lock on an iPhone, first open the camera app. Point your camera at your chosen subject. Once the yellow focus box appears, press and hold on the screen until the focus and exposure lock symbol appears, indicating that the AE/AF lock has been activated. By sliding your finger up or down on your screen, you can either brighten, or darken your exposure. When you’re happy with what you see, release the screen and take your picture.

Exposure slider
The exposure slider in the camera app on an iPhone goes one step further, allowing for more precise adjustments to the exposure levels (telling your camera how much light you want to capture) of a scene compared to using the AE lock. By sliding the exposure slider, you can fine-tune the levels of light and dark in a photo, which can help you to achieve the right balance of light and shadow.
Even better, the exposure slider allows you to separate your adjustments from the focus lock. So, for example, if you’re looking to shoot a silhouette, you can expose for the bright sky and set your focus lock on your dark subject, and keep it dark. If you’re looking to understand this in more detail, my iPhone Magic course will walk you through, step by step.
I tend to always have my exposure slider set to -1 as I’m very drawn to shooting light pockets and want those shadows to be nice and dark. I find that bringing my exposure slider down really helps achieve more creative and expressive photos when faced with bright light.
Portrait Mode
To achieve those dreamy, soft, blurred backgrounds, portrait mode is the way to go. It helps to isolate your subject and make it stand out. Portrait mode works by changing the f-number, or aperture of your camera lens, creating a sense of depth and dimension in the photo. The lower the f-number you choose, the more blurred your background will be. Drawing attention to your subject in this way can add a level of soulful expression to your photos that really captures the essence of your subject.
One more tip: make sure you have your subject move away from the background. The greater the distance between your subject and background, the more blurred your background will be to help isolate your subject beautifully.
shoot upside down
This tip is a bit of a game-changer for your camera phone photography and it’s so easy to do too. Put simply, start shooting with your phone held upside down, so that the lens is at the bottom when you are taking the photo. Doing this can be especially useful when shooting at a low-angle or ground level shots, such as when taking a photo of a flower or a child.
Holding the phone upside down allows you to get closer to the subject and capture more detail, while also giving you a unique and interesting perspective. Add in the portrait mode function and you can keep your focus locked on your subject to create something really beautiful.

burst mode
Any time you’re shooting a fast moving subject, burst mode is the way to go.
It’s a handy feature on the iPhone's camera that allows you to take multiple photos in quick succession by holding down the shutter button. It’s great for capturing the decisive moment in a scene, such as a child blowing out birthday candles or jumping into a puddle. Burst mode allows you to take multiple photos in a split second, increasing your chances of getting the perfect shot. It also allows you to review the photos and select the best one, instead of missing it. In fast-paced and unpredictable situations, where one single shot may not be enough to truly capture how that moment felt to you, it’s fantastic.
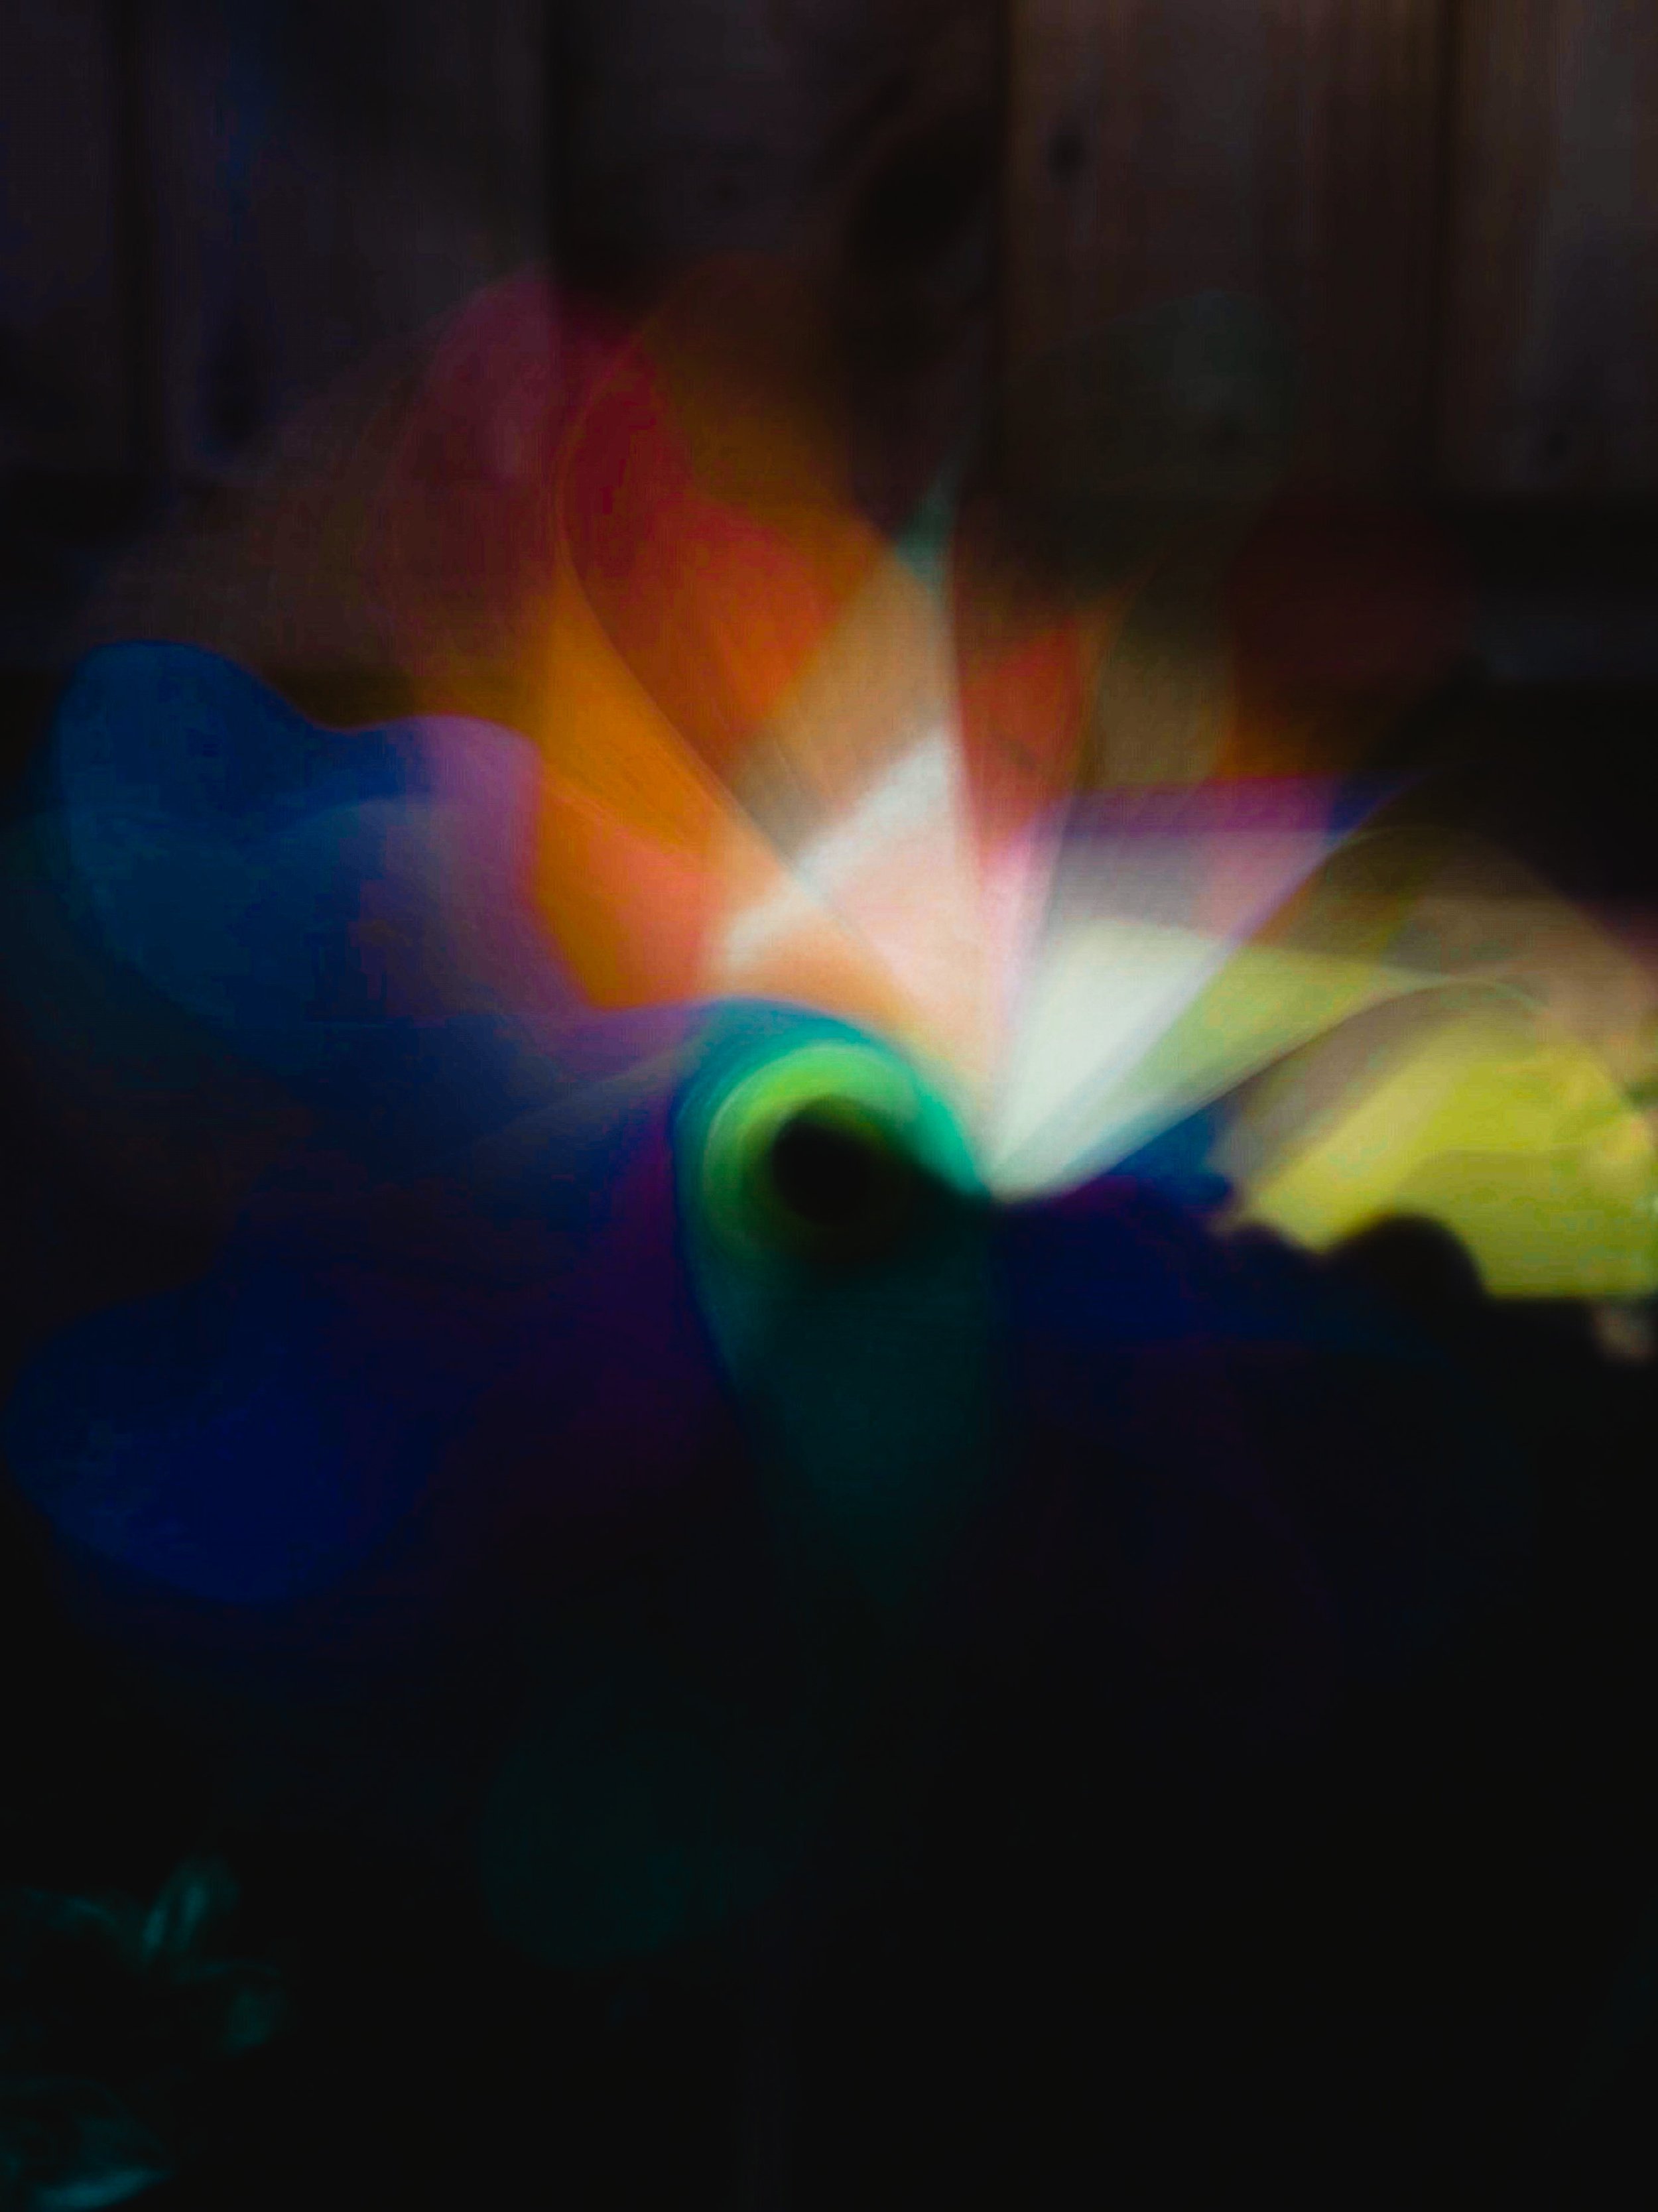
Experiment with long exposures
Shooting long exposures on an iPhone can be a great way to capture the movement of light and colour. They’re also helpful for those times where the light is low. Long exposures bring a certain softness to your photos, to create a sense of tranquility and serenity. Spinning windmills, busy streets, rippling rivers all make great subjects for capturing this kind of motion blur.
How?
To shoot a long exposure on an iPhone, just shoot in live mode and then switch the image from “live” to “long exposure”
tilt shift
If you’re a fan of soft, ethereal blur, one editing technique I find useful is a tilt-shift effect. This effect simulates the shallow depth of field that is typically achieved by using a special lens, and helps to draw attention to your subject by blurring out the background. To achieve this effect, you can use a third-party editing app like Fotor that provides a tilt-shift tool.
The tilt-shift tool allows you to select the area of the photo that you want to be in focus and the areas you want to blur. You can also adjust the intensity of the blur to achieve the desired effect. I love doing this to keep my photos from looking too polished or “perfect”.
So how about you?
Do you like to take photos to express yourself, improve your mental health and nurture your emotional well-being? If so, why not make time for some creative self-care and join us for the next run of iPhone Magic : Creative Photography in the Palm of your Hand.
Over the 4 week course, you’ll learn how photographing light, composition and colour can bring calm to your days, and that the only camera you need is the one that’s already with you, all the time. Join the waitlist here for early access to enrolment and a special 15% discount.